Get your first SLYD instance up and running in under 5 minutes.
Before you begin, make sure you have:
Navigate to https://www.slyd.com/Account/Login and sign in with your credentials. If you don't have an account yet, click "Sign Up" or navigate to https://www.slyd.com/Account/Login?signUp=true.

Fig 1. SLYD Platform Login Screen
Once logged in, select "Compute Marketplace" from the left navigation menu to browse available compute resources.
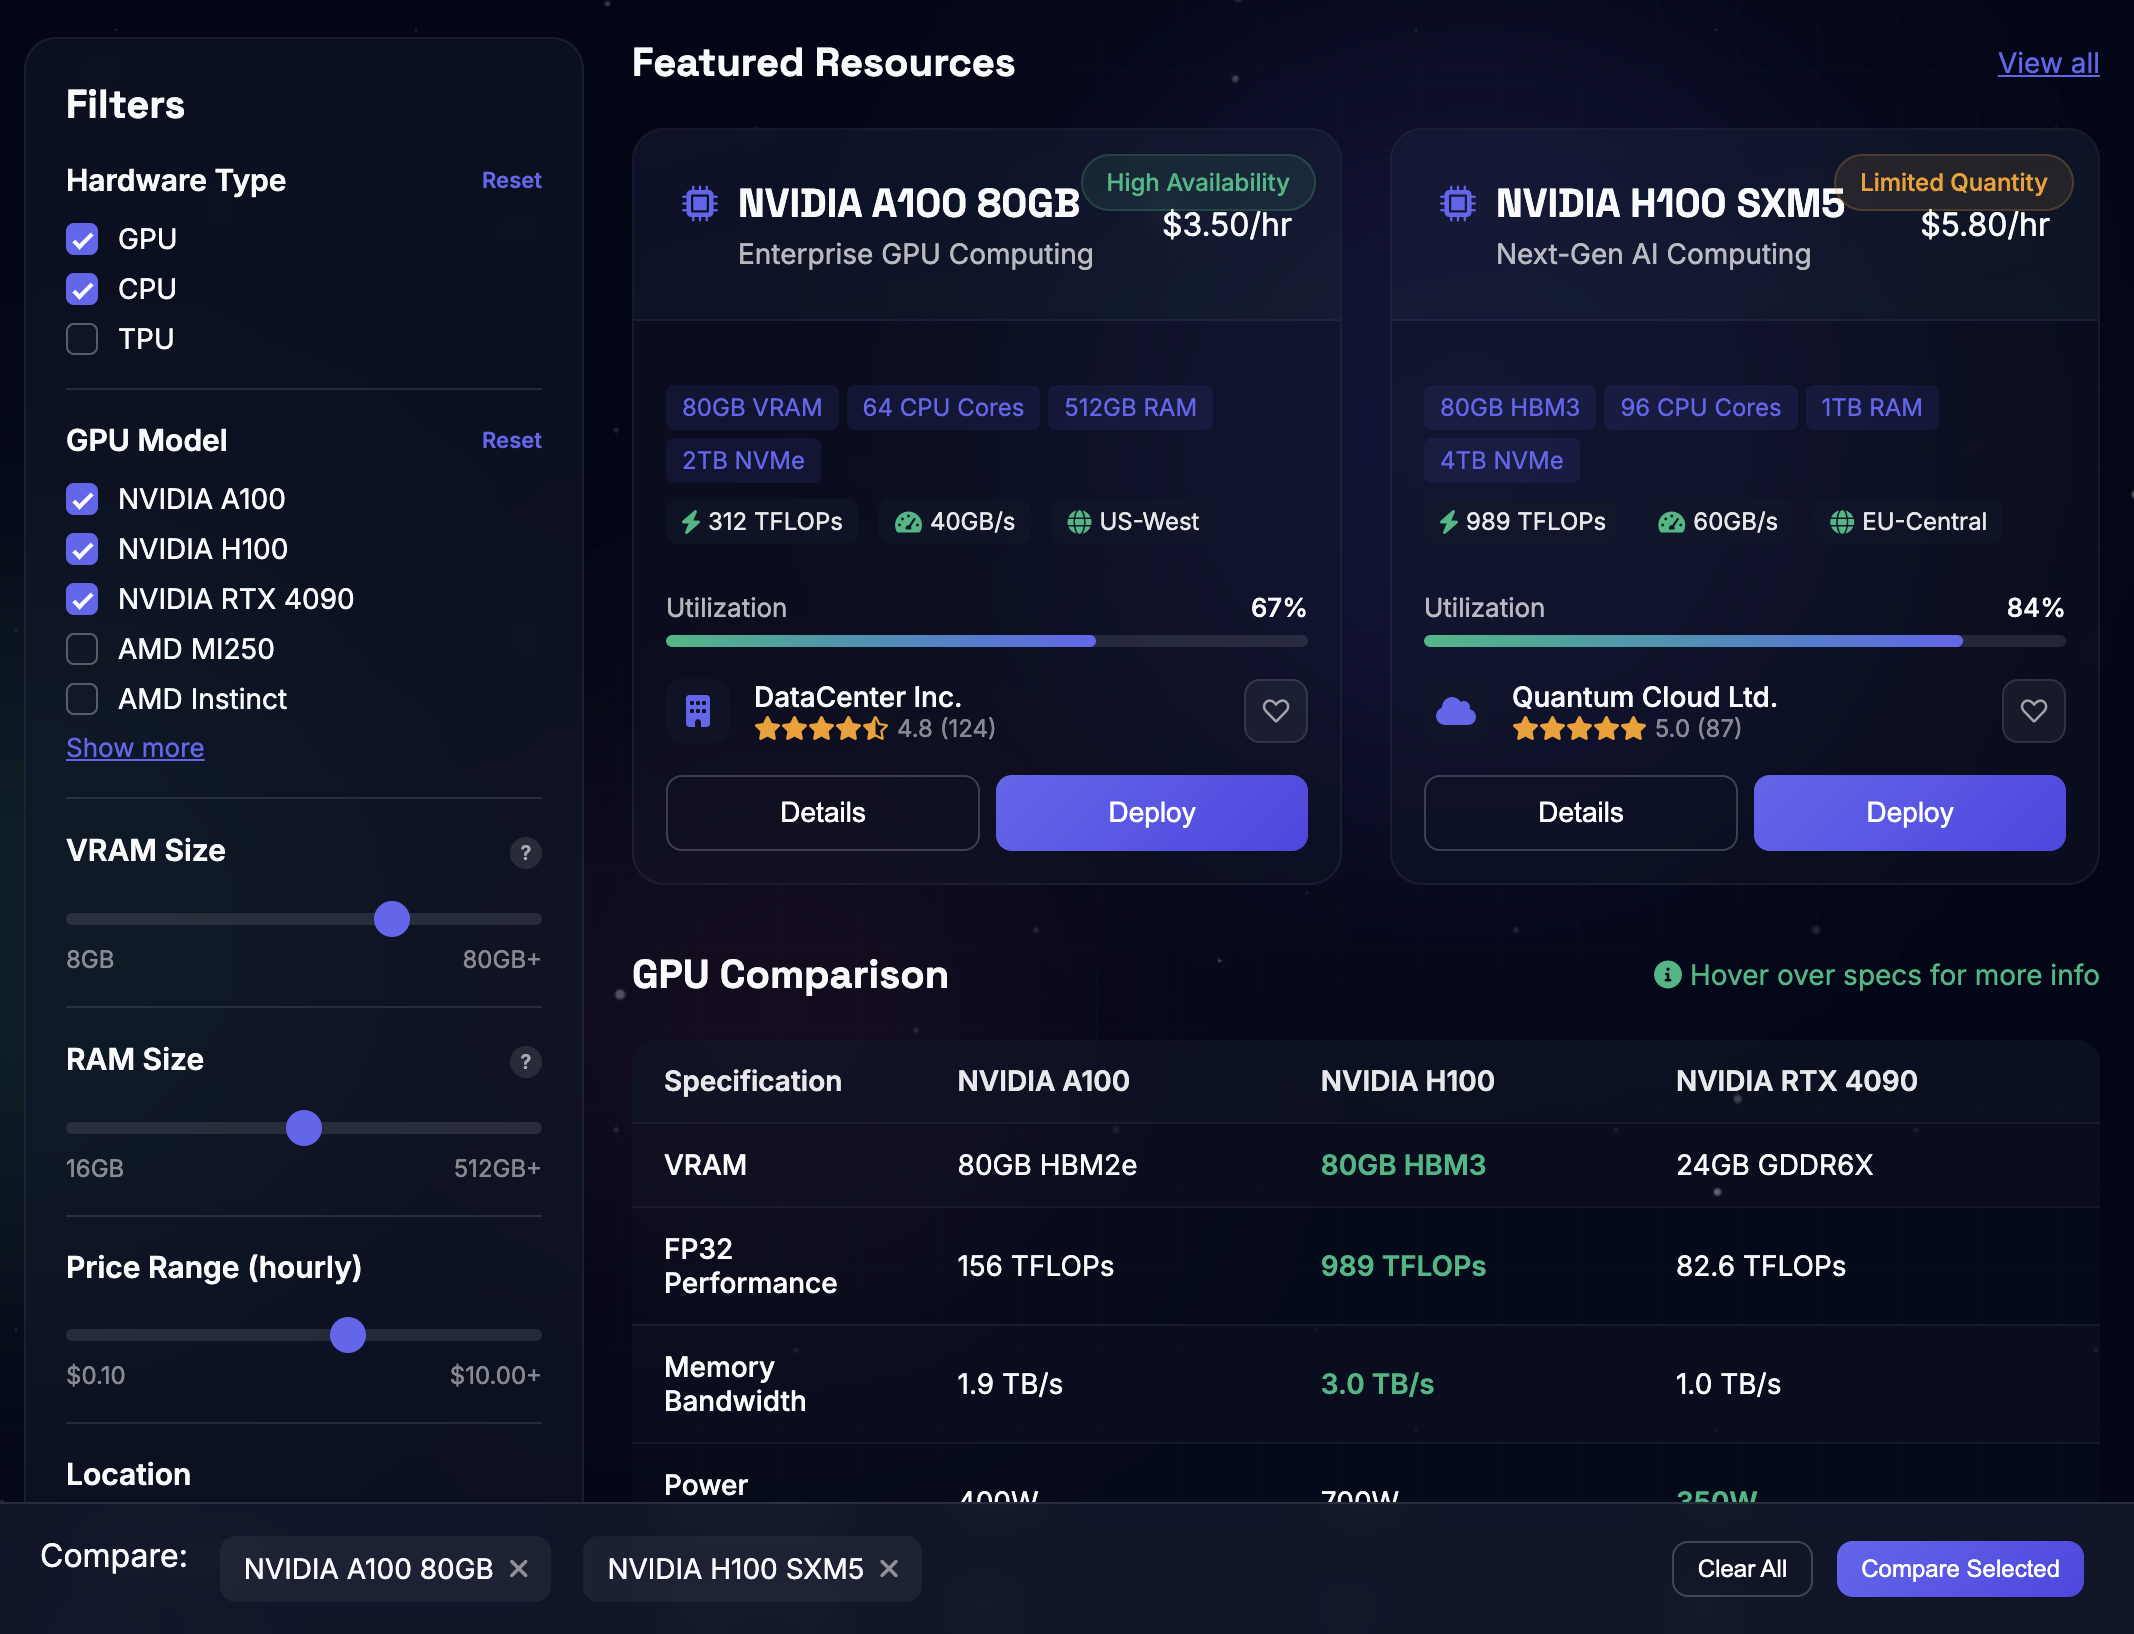
Home > Consumer Dashboard > Compute MarketplaceFrom the Compute Marketplace, you can browse various compute configurations based on your needs:

Fig 2. Compute Marketplace with GPU instance selection and comparison
Not sure which configuration to choose? Ask Benson AI for recommendations based on your use case. Simply click "Ask Benson" on the Compute Marketplace page and describe your workload needs.
After selecting a compute configuration, click "Deploy" to start configuring your instance. You'll need to provide the following details:
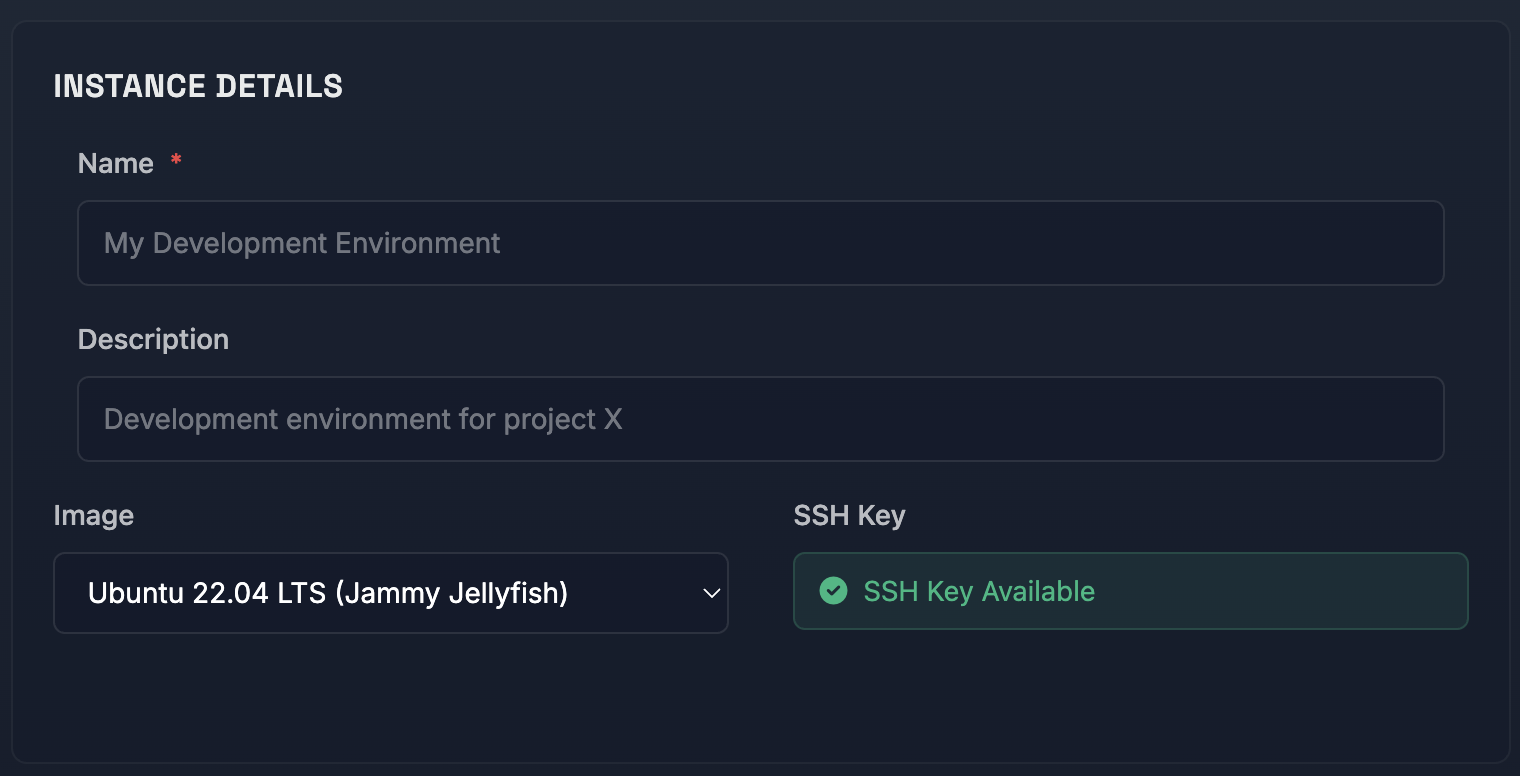
Provide a name and description for your instance to help identify its purpose.

Fig 3. Instance details with SSH key already configured.
If you have an SSH key already configured, you'll see "SSH key available". If not, you'll be redirected to add an SSH key before proceeding.
SSH keys are required for secure access to your instance. If you don't have one configured yet, you'll be prompted to generate or upload one during deployment.
Choose your CPU cores and memory (GB) based on your workload requirements.

Fig 4. Resource allocation interface for CPU cores and memory selection.
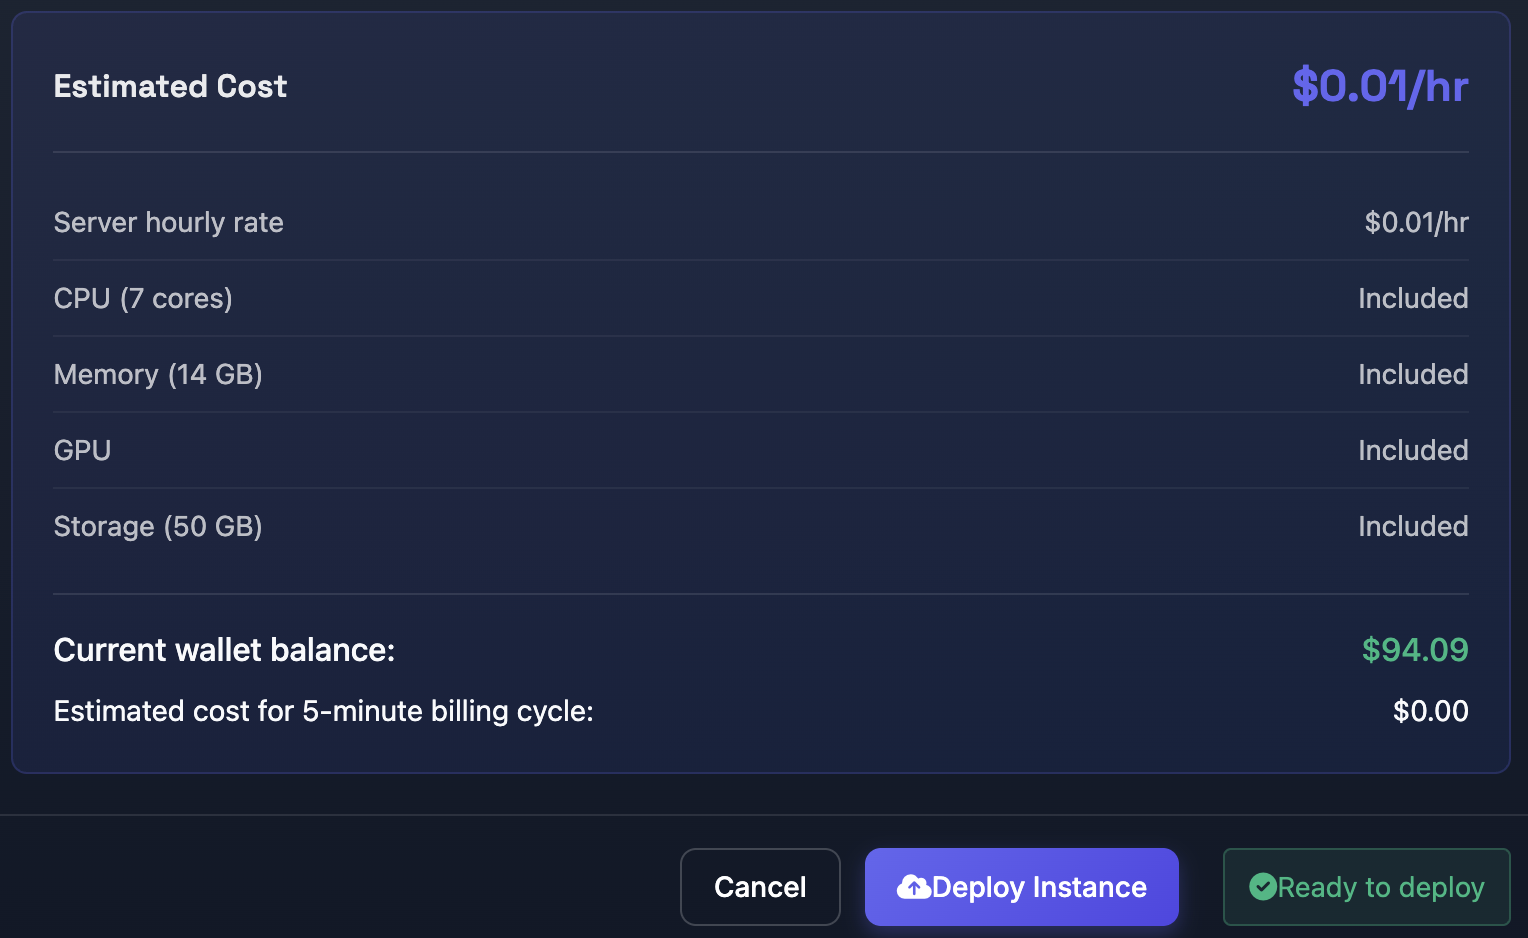
Verify the cost breakdown and click "Deploy Instance" to start provisioning. Your new instance will begin provisioning immediately.

Fig 5. Cost review and deploy instance interface.
Provisioning typically takes under a minute. You'll receive a notification when your instance is ready to use.
Once provisioned, you can connect to your instance using SSH. Follow these steps to get your connection command:
Navigate to the bottom right of your instance page and locate the Actions window.

Fig 6. Actions window located at the bottom right of the instance page.
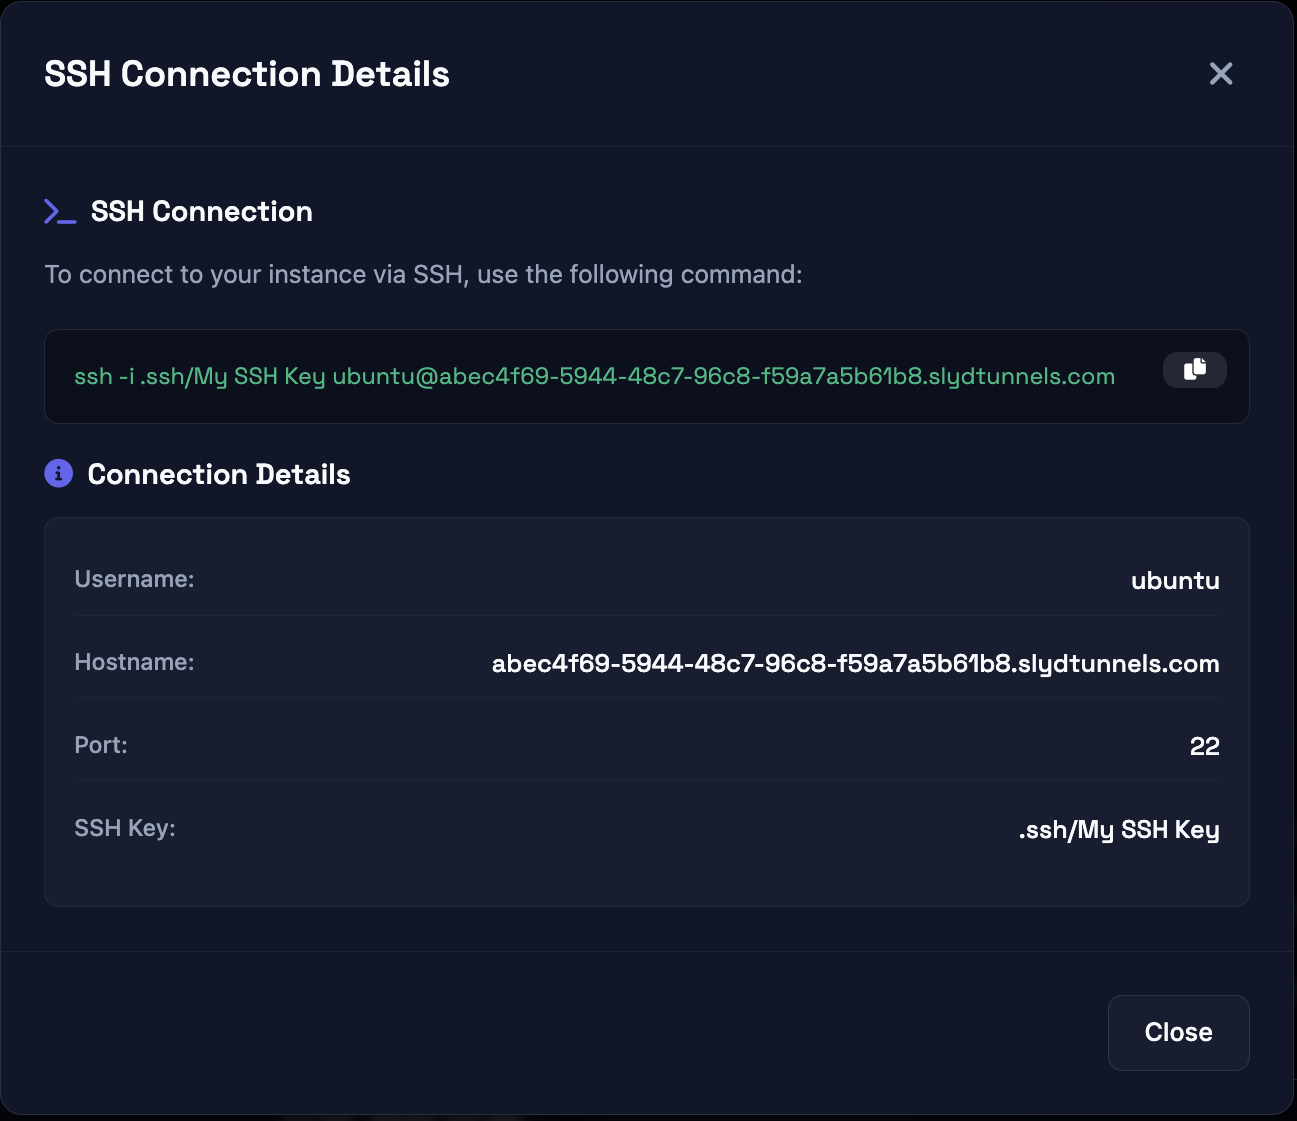
Click on the SSH button to reveal your connection command.

Fig 7. SSH connection details with command to copy.
SLYD uses Cloudflare tunnels for secure SSH connections. You need to install cloudflared on your local machine first.
# Download cloudflared
Invoke-WebRequest -Uri https://github.com/cloudflare/cloudflared/releases/latest/download/cloudflared-windows-amd64.exe -OutFile cloudflared.exe

# Add to PATH (optional but recommended)
# Move cloudflared.exe to C:\Windows\System32\ or add its location to PATH# Install using Homebrew
brew install cloudflaredAlternatively, download the binary from GitHub releases.
# Debian/Ubuntu
wget -q https://github.com/cloudflare/cloudflared/releases/latest/download/cloudflared-linux-amd64.deb
sudo dpkg -i cloudflared-linux-amd64.deb

# Or via snap
sudo snap install cloudflared

# Or download binary directly
wget -q https://github.com/cloudflare/cloudflared/releases/latest/download/cloudflared-linux-amd64
chmod +x cloudflared-linux-amd64
sudo mv cloudflared-linux-amd64 /usr/local/bin/cloudflaredAdd the following configuration to your SSH config file to enable cloudflared proxy for SLYD instances.
# Add this to your SSH config file
Host *.slyd.cloud
ProxyCommand cloudflared access ssh --hostname %hC:\Users\%USERNAME%\.ssh\config~/.ssh/configchmod 600 ~/.ssh/config on macOS/LinuxTest that cloudflared is properly installed and configured:
# Check cloudflared version
cloudflared --version

# Test tunnel connectivity (should show usage info)
cloudflared access ssh --helpCopy the provided SSH command and replace <my ssh key> with the path to your actual SSH key that matches the one stored in "My Account".
Web-based console access is coming soon to the SLYD platform.
ssh -i .ssh <my ssh key> ubuntu@example-instance-12345.slyd.cloud<my ssh key> with the actual path to your SSH private key fileError: "cloudflared: command not found"
Error: "Permission denied (publickey)"
chmod 600 ~/.ssh/your-keyError: "Failed to connect to proxy"
cloudflared access ssh --hostname your-instance.slyd.cloud directlyNow that you have your first instance up and running, here are some recommended next steps:
Learn about instance management, monitoring, and optimization
Install and configure applications on your instance
Learn about the secure tunneling capabilities
Step-by-step guides for common use cases
We're constantly improving our documentation. Let us know how we can make it better!